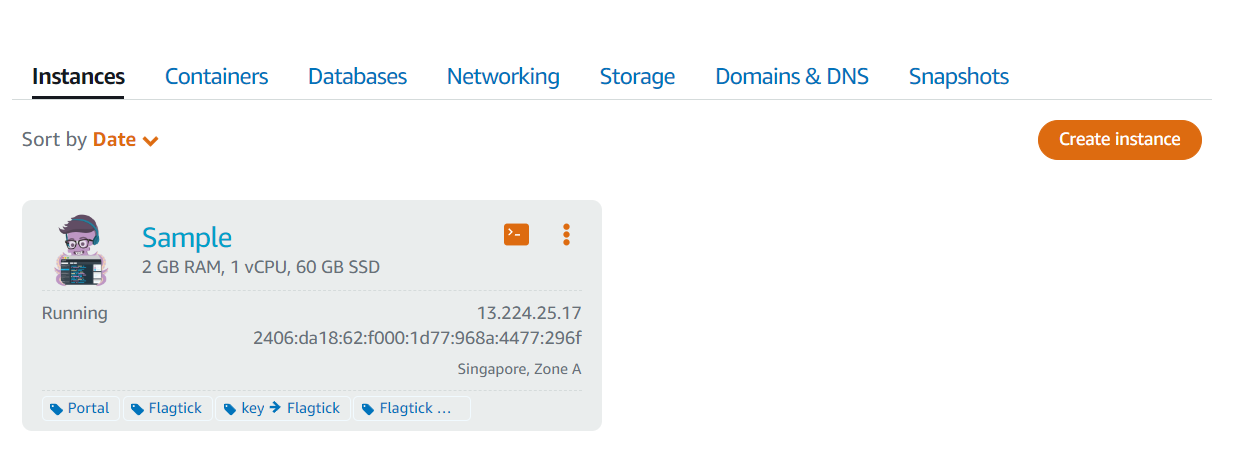
• First of all, you need to prepare VPS running Ubuntu. Here, we are using Lightsail VPS by AWS and carry out of install redmine as slug for Public IP 13.224.25.17.
Using the command as below in Ubuntu or Debian-based systems to update the package list from all configured repositories:
sudo apt update && sudo apt upgrade
• The next step, you need to install the MariaDB database server on Ubuntu or other Debian-based Linux distributions.
sudo apt install mariadb-server
• Once you have installed MySQL server successfully, there are two ways to create database and configure administrative privileges.
» Plesk Panel / CPanel
» Use `sudo mysql -u root`.
Welcome to the MariaDB monitor.  Commands end with ; or \g.
Your MariaDB connection id is 29983
Server version: 10.3.38-MariaDB-0ubuntu0.20.04.1 Ubuntu 20.04

Copyright (c) 2000, 2018, Oracle, MariaDB Corporation Ab and others.

Type 'help;' or '\h' for help. Type '\c' to clear the current input statement.

MariaDB [(none)]> SHOW DATABASES;
+--------------------+
| Database           |
+--------------------+
| admin_blog         |
| admin_redmine      |
| apsc               |
| information_schema |
| mysql              |
| performance_schema |
| phpmyadmin         |
| psa                |
| roundcubemail      |
+--------------------+
10 rows in set (0.012 sec)
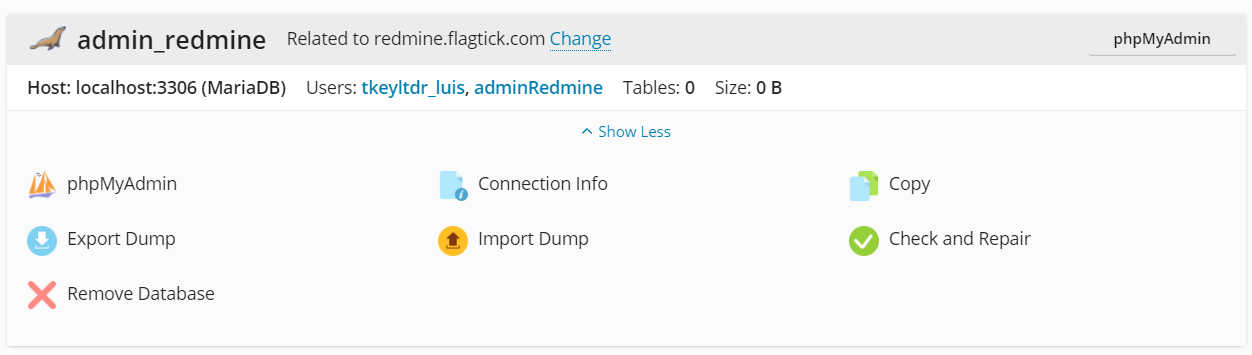
Or Or using code to create a MySQL database with the name `admin_redmine`, username `adminRedmine`, and password `Abc@123456`.
sudo mysql -u root -p
mysql> CREATE DATABASE admin_redmine CHARACTER SET utf8mb4 COLLATE utf8mb4_unicode_ci;
mysql> CREATE USER 'adminRedmine'@'localhost' IDENTIFIED BY 'Abc@123456';
mysql> GRANT ALL PRIVILEGES ON admin_redmine.* TO 'adminRedmine'@'localhost';
mysql> FLUSH PRIVILEGES;
mysql> EXIT;
Note: Open a terminal and type the following command to log in to the MySQL server as the `adminRedmine` user:
mysql -u adminRedmine -p
• Carry of installing the Apache web server and the Passenger module on a Ubuntu system and check status of the Apache2 service.
sudo apt install apache2 libapache2-mod-passenger
sudo systemctl status apache2.service
• Then, install the Redmine project management tool and its dependencies on an Ubuntu system.
sudo apt install redmine redmine-mysql
Note: During the installation process, you will be prompted to enter and confirm a password in order to grant database access to admin_redmine.
• Gems are packages that contain code and functionality that can be integrated into Ruby projects. Hence, let us update Ruby gems to their latest versions for Redmine.
sudo gem update
sudo gem install thread_safe -v 0.3.6
sudo gem install bundler
sudo gem install actionpack-xml_parser -v 2.0.1
sudo gem install mail -v 2.7.1
sudo gem install arel -v 9.0.0
sudo gem install roadie -v 4.0.0
sudo gem install rails-dom-testing -v 2.0.3
sudo bundle install --without development test
sudo bundle exec rake generate_secret_token
• Run the database migration for a Ruby on Rails application in a production environment.
RAILS_ENV=production bundle exec rake db:migrate || bundle exec rake db:migrate RAILS_ENV=production
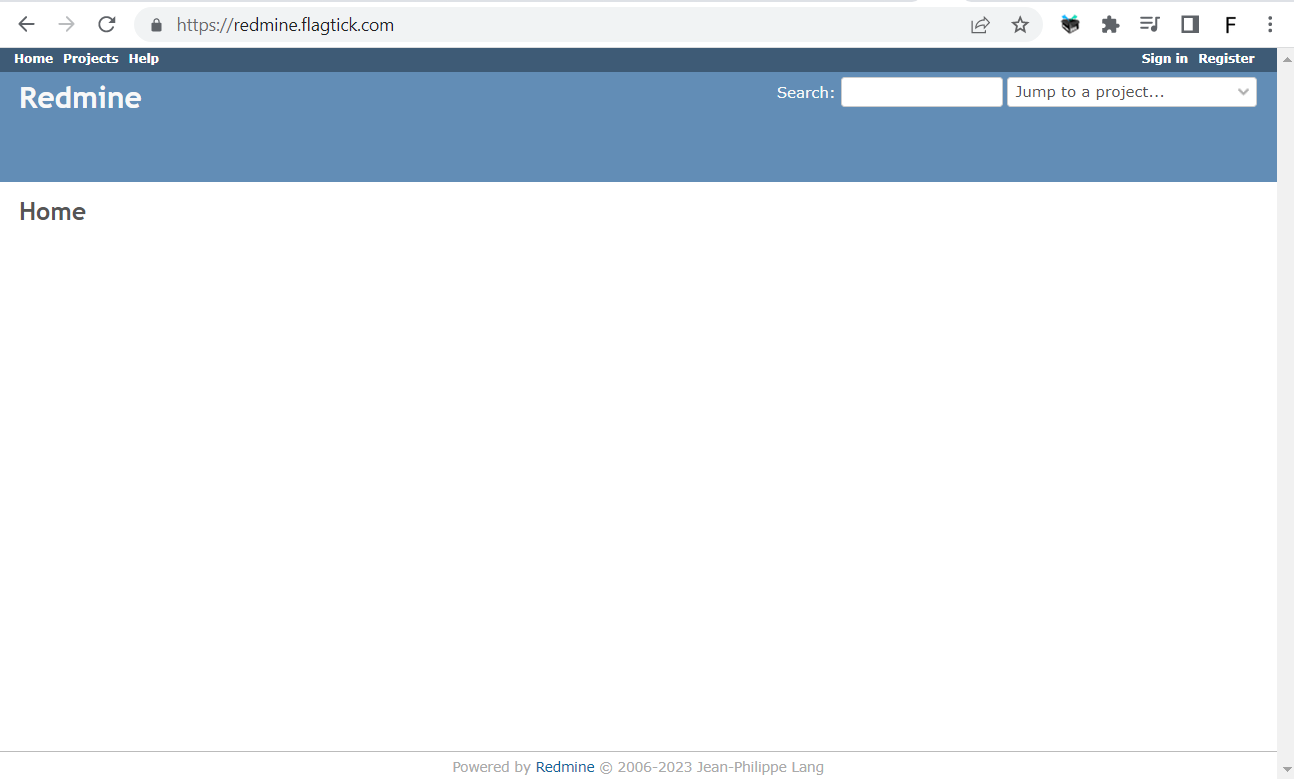
If you remove the default index.html file from the DocumentRoot directory, and configure Apache to serve Redmine on a subdomain, then the subdomain will load Redmine instead of the default page.
• Coming here, we have two web servers on Lightsail VPS, one operating with Plesk Panel and the other utilizing the Apache2 server. We need to determine which server the subdomain was created to run on.
curl -I redmine.flagtick.com
HTTP/1.1 301 Moved Permanently
Server: nginx
Date: Wed, 03 May 2023 09:37:22 GMT
Content-Type: text/html
Content-Length: 162
Connection: keep-alive
Location: https://redmine.flagtick.com/
» Apache Web Server:
• Create virtual host for the subdomain in Apache by creating file in `/etc/apache2/sites-available/redmine.flagtick.com.conf` directory with the following:
<VirtualHost *:80>
    ServerName redmine.flagtick.com
    DocumentRoot /var/www/vhosts/flagtick.com/redmine/public
    <Directory /var/www/vhosts/flagtick.com/redmine/public>
        Options FollowSymLinks
        AllowOverride None
        Require all granted
    </Directory>
    ErrorLog ${APACHE_LOG_DIR}/redmine_error.log
    CustomLog ${APACHE_LOG_DIR}/redmine_access.log combined
</VirtualHost>
• Enable the virtual host by creating a symbolic link in the `/etc/apache2/sites-enabled/` directory:
sudo ln -s /var/www/vhosts/system/redmine.flagtick.com/conf/redmine.flagtick.com.conf /etc/apache2/sites-available/
sudo a2ensite redmine.flagtick.com.conf
• Restart Apache to apply the changes:
sudo systemctl restart apache2
Note: If we are using Plesk panel, we will have folder structure like this:
/etc/apache2/plesk.conf.d/vhosts$ ls -a
.  ..  code.flagtick.com.conf  flagtick.com.conf  nano.save  redmine.flagtick.com.conf
/etc/nginx/plesk.conf.d/vhosts$ ls -a
. .. code.flagtick.com.conf flagtick.com.conf redmine.flagtick.com.conf
View the configuration, use the cat command and pay attention to the error_log file to detect any issues that may be occurring on a domain or subdomain.
» Nginx Web Server:
/etc/nginx/plesk.conf.d/vhosts$ ls -a
.  ..  code.flagtick.com.conf  flagtick.com.conf  redmine.flagtick.com.conf
It is default and generated automatically by Plesk panel. Propose you using GUI to manage and configure.
» Plesk Panel:
• Sometimes, you may encounter errors while launching the Redmine server. To troubleshoot, navigate to the /var/www/vhosts/system/redmine.flagtick.com/logs/error_log file and observe any relevant logs.
cat /var/www/vhosts/system/redmine.flagtick.com/logs/error_log
• Modify the Apache configuration file for the subdomain redmine.flagtick.com in root path /var/www/vhosts/system/redmine.flagtick.com/conf/httpd.conf and add the following configuration:
/var/www/vhosts/system/redmine.flagtick.com/conf$ cat httpd.conf
Note: Change the following line: DocumentRoot "/var/www/vhosts/flagtick.com/redmine" to DocumentRoot "/var/www/vhosts/flagtick.com/redmine/public". You should also make the same change to any other part of the configuration file that includes a path.
Then run sudo systemctl restart apache2 to restart Apache server and you can see redmine.flagtick.com.conf file was generated in path /etc/apache2/plesk.conf.d/vhosts/ folder.
cat /etc/apache2/plesk.conf.d/vhosts/redmine.flagtick.com.conf
You can use the ls -l command to list the owner and group of the directory:
ls -l /var/www/vhosts/flagtick.com/redmine/
• Check the permissions of the Redmine directory and ensure that the Apache user has permission to access it. You can do this by running the following command:
-rwxrwxrwx  1 flagtick psacln   464 Apr 14 05:00 index.html

=> sudo chown -R flagtick:psacln /var/www/vhosts/flagtick.com/redmine
=> sudo chmod -R 0777 .bundle/
=> sudo chmod -R 0777 Gemfile.lock
=> bundle exec rails server -e production || sudo bundle exec rails server -e production
Sometimes, you may be missing the mysql2 dependency in your Gemfile. In this case, you will need to install mysql2 by running the command sudo gem install mysql2. To add the mysql2 gem to your Gemfile, open the file in a text editor and add the following line:
sudo nano Gemfile

<TextEditor>
    gem "rails", "~> 5.2.2"
    gem "rouge", "~> 3.7"
    gem "mysql2"
    gem "request_store", "~> 1.1"
</TextEditor>

bundle install
• Carry out of appropriate version of Redmine or you encounter that there is some other issue with your installation. For example: Our redmine has version is 4.2.3
cat lib/redmine/version.rb
• Visit the official Redmine website and use the following command to download the appropriate version of Redmine:
wget https://www.redmine.org/releases/redmine-5.0.5.tar.gz
tar xzf redmine-5.0.5.tar.gz
sudo cp -r redmine-5.0.5 redmine

// Kill Port 3000
sudo lsof -i :3000 || sudo kill <pid>
sudo bundle exec rails server -e production
• Using curl to check whether the Redmine server has started successfully or not?
curl --verbose 0.0.0.0:3000
• Getting start Redmine Rails server as a systemd service, you can create `redmine.service` file in the `/etc/systemd/system/` directory with the following content:
/etc/systemd/system$ ls -a
 .                                        sleep.target.wants
 ..                                      'snap-amazon\x2dssm\x2dagent-4046.mount'
 bind9.service                           'snap-amazon\x2dssm\x2dagent-6312.mount'
 cloud-final.service.wants                snap-core18-2714.mount
 cloud-init.target.wants                  snap-core18-2721.mount
 dbus-org.freedesktop.resolve1.service    snap-core20-1828.mount
 dbus-org.freedesktop.timesync1.service   snap-core20-1852.mount
 default.target.wants                     snap-lxd-21835.mount
 elasticsearch.service                    snap-lxd-24061.mount
 emergency.target.wants                   snap-snapd-18596.mount
 final.target.wants                       snap-snapd-18933.mount
 getty.target.wants                       snap.amazon-ssm-agent.amazon-ssm-agent.service
 graphical.target.wants                   snap.lxd.activate.service
 iscsi.service                            snap.lxd.daemon.service
 mdmonitor.service.wants                  snap.lxd.daemon.unix.socket
 multi-user.target.wants                  snapd.mounts.target.wants
 multipath-tools.service                  sockets.target.wants
 mysql.service                            [email protected]
 mysqld.service                           sshd.service
 network-online.target.wants              sysinit.target.wants
 open-vm-tools.service.requires           syslog.service
 paths.target.wants                       timers.target.wants
 plesk-ssh-terminal.service.d             vmtoolsd.service
 rescue.target.wants
» redmine.service
[Unit]
Description=Redmine Rails Server
[Service]
Type=simple
User=ubuntu
WorkingDirectory=/var/www/vhosts/flagtick.com/redmine
ExecStart=/bin/bash -lc 'sudo bundle exec rails server -e production'
Restart=always

[Install]
WantedBy=multi-user.target
• Reload the systemd daemon to load the new service and enable the service to start at boot time:
sudo systemctl daemon-reload
sudo systemctl enable redmine.service
sudo systemctl start redmine.service
Note: The Rails server starts on port 3000. Therefore, if any errors occur, you will need to free port 3000 by killing the process.
• If you want to access Redmine using the subdomain redmine.flagtick.com on port 80 instead of port 3000, you need to configure your web server to proxy the requests to the Rails server.
sudo a2enmod proxy
sudo a2enmod proxy_http
sudo a2enmod proxy_balancer
sudo a2enmod lbmethod_byrequests
• Navigate to `/var/www/vhosts/system/redmine.flagtick.com/conf/httpd.conf` and modify two properties:
DocumentRoot "/var/www/vhosts/flagtick.com/redmine/public"
<Directory /var/www/vhosts/flagtick.com/redmine/public>
..
</Directory>
• Run sudo systemctl restart apache2 to apply new configuration and using curl to check redmine.flagtick.com point out correct folder redmine/public.
curl --verbose https://redmine.flagtick.com/404.html
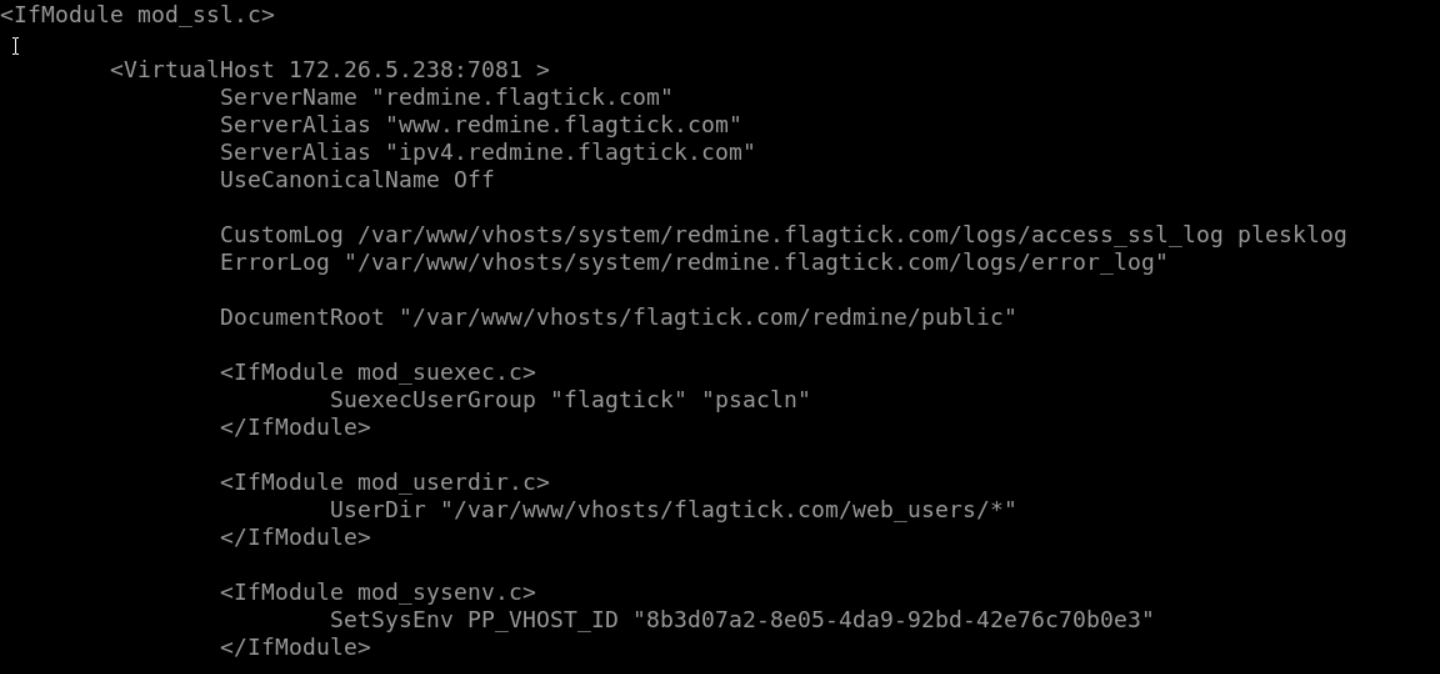
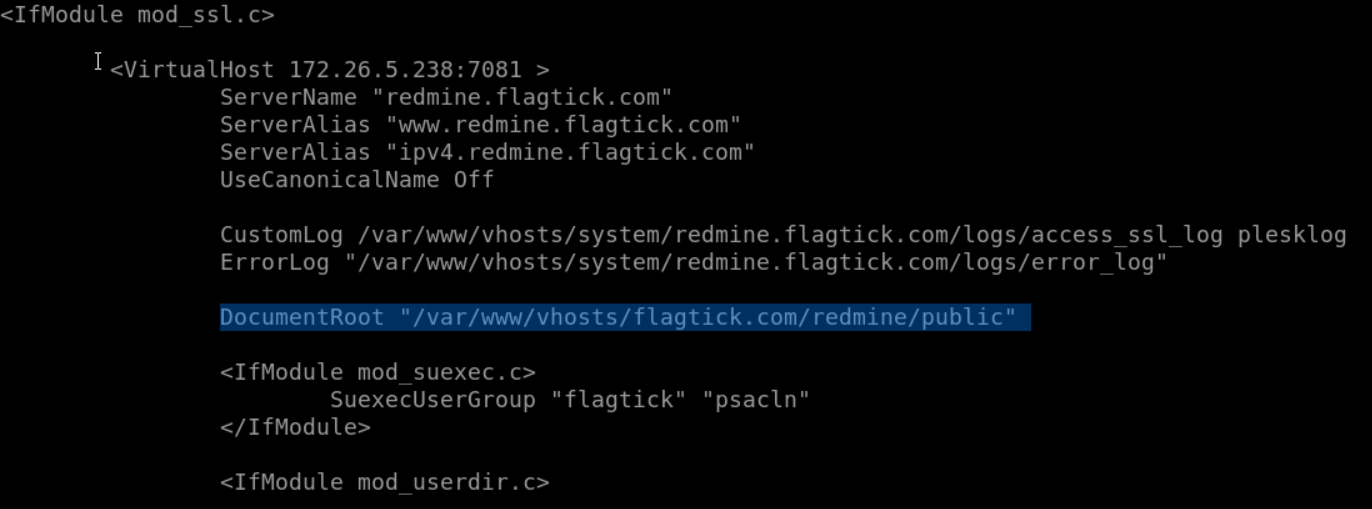
• Configure proxy requests to a Rails server running on port 3000 for the subdomain redmine.flagtick.com:
#DO NOT MODIFY THIS FILE BECAUSE IT WAS GENERATED AUTOMATICALLY,
#SO ALL YOUR CHANGES WILL BE LOST THE NEXT TIME THE FILE IS GENERATED.
#IF YOU REQUIRE TO APPLY CUSTOM MODIFICATIONS, PERFORM THEM IN THE FOLLOWING FILES:
#/var/www/vhosts/system/redmine.flagtick.com/conf/vhost.conf
#/var/www/vhosts/system/redmine.flagtick.com/conf/vhost_ssl.conf
<IfModule mod_ssl.c>


	<VirtualHost 172.26.5.238:7081 >
		ServerName "redmine.flagtick.com"
		ServerAlias "www.redmine.flagtick.com"
		ServerAlias "ipv4.redmine.flagtick.com"
		UseCanonicalName Off
                ProxyPreserveHost On
                ProxyPass / http://localhost:3000/
                ProxyPassReverse / http://localhost:3000/
		CustomLog /var/www/vhosts/system/redmine.flagtick.com/logs/access_ssl_log
plesklog
		ErrorLog "/var/www/vhosts/system/redmine.flagtick.com/logs/error_log"
• Finally, run sudo systemctl restart apache2 to restart Apache server and we have result as below: