Integrating Elasticsearch into a Laravel application by installing it on a server and configuring it to work with Laravel can be challenging and complicated. However, successful configuration can significantly enhance the search functionality and improve the user experience.
Our article provides guidance on how to set up Elasticsearch to work with a Laravel application, resulting in efficient and speedy data retrieval. By following the outlined steps, you can unlock Elasticsearch advanced search capabilities and integrate them seamlessly into your Laravel application, resulting in a better search experience for your users.
The following topics will be covered:
- Setup New Laravel Project
- Install Elasticsearch PHP Client
- Implement ElasticSearch in Laravel Application
- Install Elasticsearch on Ubuntu VPS
I. Setup New Laravel Project
Before proceeding with the article, it would be helpful to have a Laravel project available to practice along with the implementation steps. If you don't have one yet, we recommend installing Laravel or using an existing project.
To create a new Laravel project with Laravel version 7.x, you can use the following command:
composer create-project --prefer-dist laravel/laravel flagtickproject "7.*"
If your local machine has been upgraded to PHP 8, it may not be appropriate to use Laravel version 7, and you may need to migrate to Laravel 8. To do this, you can modify the composer.json file and run composer update to synchronize the dependencies.
» composer.json
"require": {
    "php": "^8.0.2",
    ...
    "laravel/framework": "^8.0",
    ...
},
"autoload": {
    "psr-4": {
        "App\\": "app/"
    },
    "classmap": [
        "database/seeders",
        "database/factories"
    ]
},
Making sure that you are working with the correct version of Laravel or confirming that a specific version of Laravel has been installed correctly on your system
php artisan --version
Once you have configured the database connection, set the application key, performed any necessary database schema migrations, and launched the application, you can then launch your Laravel application.
php artisan key:generate
php artisan migrate
php artisan serve
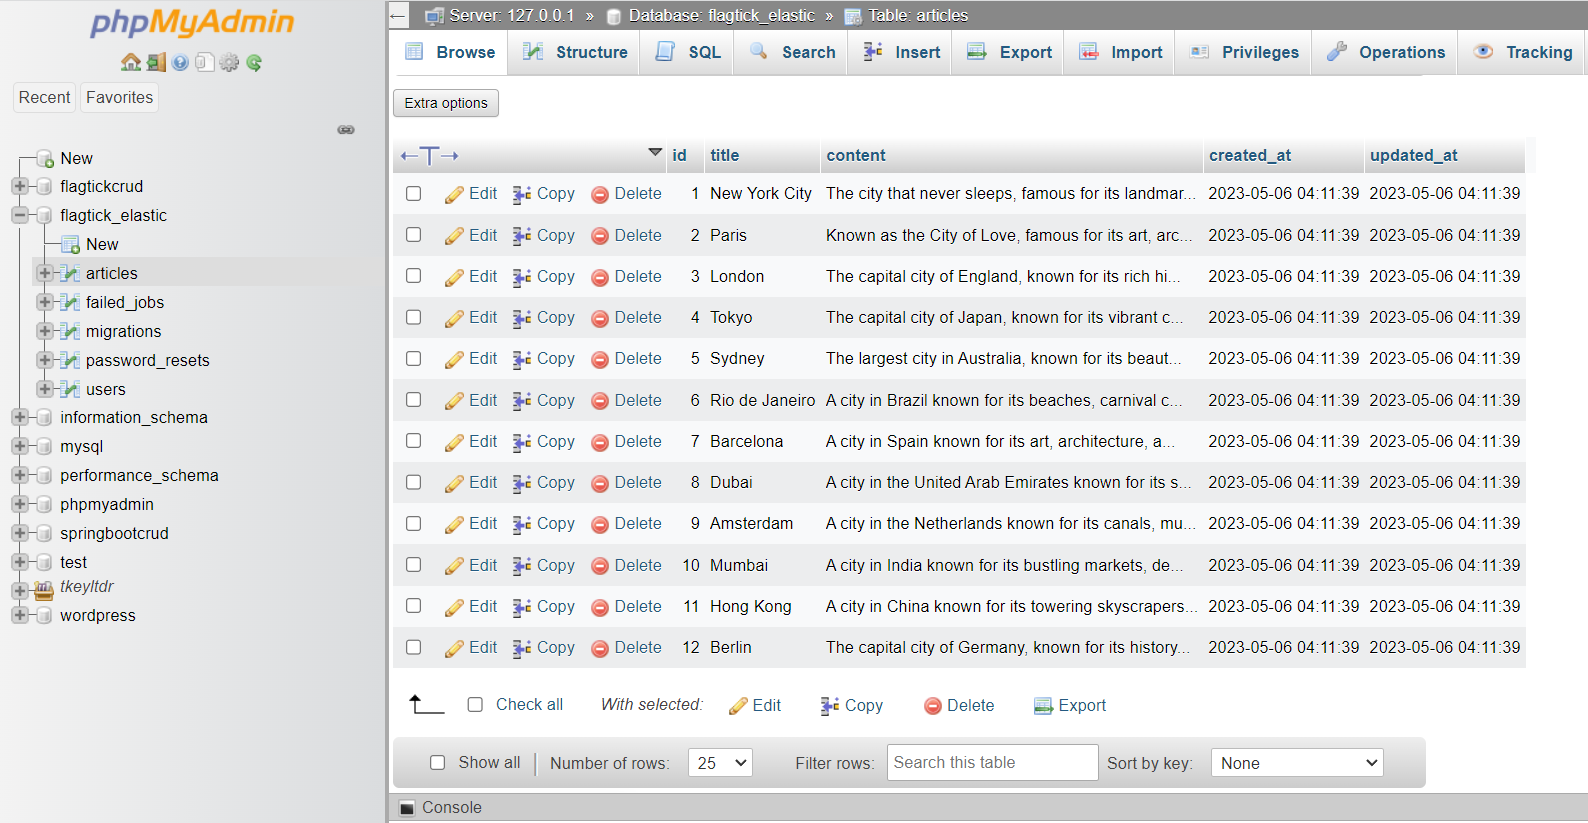
You can access the application by opening a web browser and navigating to http://localhost:8000. Let create a migration file for creating a new database table named "articles" and modify migration file in the "database/migrations" directory by adding the necessary fields to the "up" method.
php artisan make:migration create_articles_table
» CreateArticlesTable.php
class CreateArticlesTable extends Migration
{
    /**
     * Run the migrations.
     *
     * @return void
     */
    public function up()
    {
        Schema::create('articles', function (Blueprint $table) {
            $table->id();
            $table->string('title');
            $table->text('content');
            $table->timestamps();
        });
    }

    /**
     * Reverse the migrations.
     *
     * @return void
     */
    public function down()
    {
        Schema::dropIfExists('articles');
    }
}
Let move to insert some sample data to the "articles" table by creating a new database seed file with the following command:
php artisan make:seeder ArticlesTableSeeder
» ArticlesTableSeeder.php
class ArticlesTableSeeder extends Seeder
{
    /**
     * Run the database seeds.
     *
     * @return void
     */
    public function run()
    {
        DB::table('articles')->insert([
            [
                'title' => 'New York City',
                'content' => 'The city that never sleeps, famous for its landmarks such as the Statue of Liberty and Central Park.',
                'created_at' => now(),
                'updated_at' => now()
            ],
            [
                'title' => 'Paris',
                'content' => 'Known as the City of Love, famous for its art, architecture, and landmarks such as the Eiffel Tower and Louvre Museum.',
                'created_at' => now(),
                'updated_at' => now()
            ],
            [
                'title' => 'London',
                'content' => 'The capital city of England, known for its rich history and landmarks such as Big Ben and the Tower of London.',
                'created_at' => now(),
                'updated_at' => now()
            ],
            [
                'title' => 'Tokyo',
                'content' => 'The capital city of Japan, known for its vibrant culture, delicious food, and landmarks such as Tokyo Tower and Shibuya Crossing.',
                'created_at' => now(),
                'updated_at' => now()
            ],
            [
                'title' => 'Sydney',
                'content' => 'The largest city in Australia, known for its beautiful beaches, stunning harbor, and landmarks such as the Opera House and Harbour Bridge.',
                'created_at' => now(),
                'updated_at' => now()
            ],
            [
                'title' => 'Rio de Janeiro',
                'content' => 'A city in Brazil known for its beaches, carnival celebrations, and landmarks such as Christ the Redeemer and Sugarloaf Mountain.',
                'created_at' => now(),
                'updated_at' => now()
            ],
            [
                'title' => 'Barcelona',
                'content' => 'A city in Spain known for its art, architecture, and landmarks such as the Sagrada Familia and Park Guell.',
                'created_at' => now(),
                'updated_at' => now()
            ],
            [
                'title' => 'Dubai',
                'content' => 'A city in the United Arab Emirates known for its skyscrapers, shopping, and landmarks such as the Burj Khalifa and Dubai Fountain.',
                'created_at' => now(),
                'updated_at' => now()
            ],
            [
                'title' => 'Amsterdam',
                'content' => 'A city in the Netherlands known for its canals, museums, and landmarks such as the Anne Frank House and Van Gogh Museum.',
                'created_at' => now(),
                'updated_at' => now()
            ],
            [
                'title' => 'Mumbai',
                'content' => 'A city in India known for its bustling markets, delicious street food, and landmarks such as the Gateway of India and Elephanta Caves.',
                'created_at' => now(),
                'updated_at' => now()
            ],
            [
                'title' => 'Hong Kong',
                'content' => 'A city in China known for its towering skyscrapers, delicious food, and landmarks such as Victoria Peak and the Big Buddha.',
                'created_at' => now(),
                'updated_at' => now()
            ],
            [
                'title' => 'Berlin',
                'content' => 'The capital city of Germany, known for its history, culture, and landmarks such as the Berlin Wall and Brandenburg Gate.',
                'created_at' => now(),
                'updated_at' => now()
            ],
        ]);
    }
}
In Laravel 7 and earlier versions, the database/seeds directory was used for storing seed classes that were responsible for populating the database with test data.
Starting from Laravel 8, the database/seeds directory was renamed to database/seeders for consistency with other directory names in Laravel.
» DatabaseSeeder.php
class DatabaseSeeder extends Seeder
{
    /**
     * Seed the application's database.
     *
     * @return void
     */
    public function run()
    {
        $this->call(ArticlesTableSeeder::class);
    }
}
Run the database seeder using the following command:
php artisan db:seed
By default, the command runs the DatabaseSeeder class, which can call other seed classes to perform more specific seeding tasks.
II. Install Elasticsearch PHP Client
Elasticsearch is often used to store, search, and analyze large volumes of data in real-time, making it a popular choice for various applications, including e-commerce, logging, and security analytics.
To get started, go to the official Elasticsearch website and download the latest version of Elasticsearch for Windows.
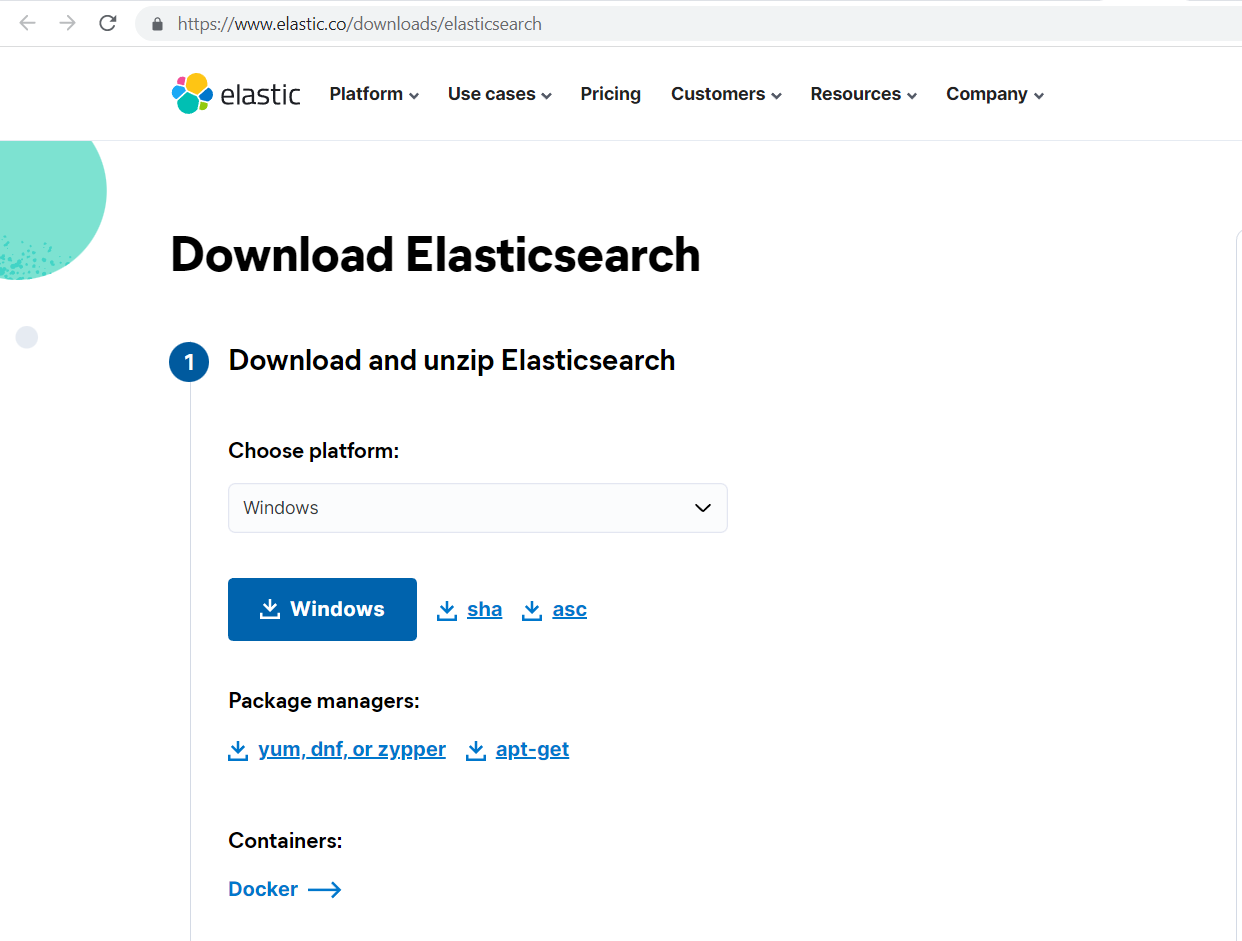
Before moving forward, you need to specify the path to the folder where you want to install Elasticsearch. Once you have done that, you can move on to the next step, which involves extracting the downloaded Elasticsearch files and launching the application.
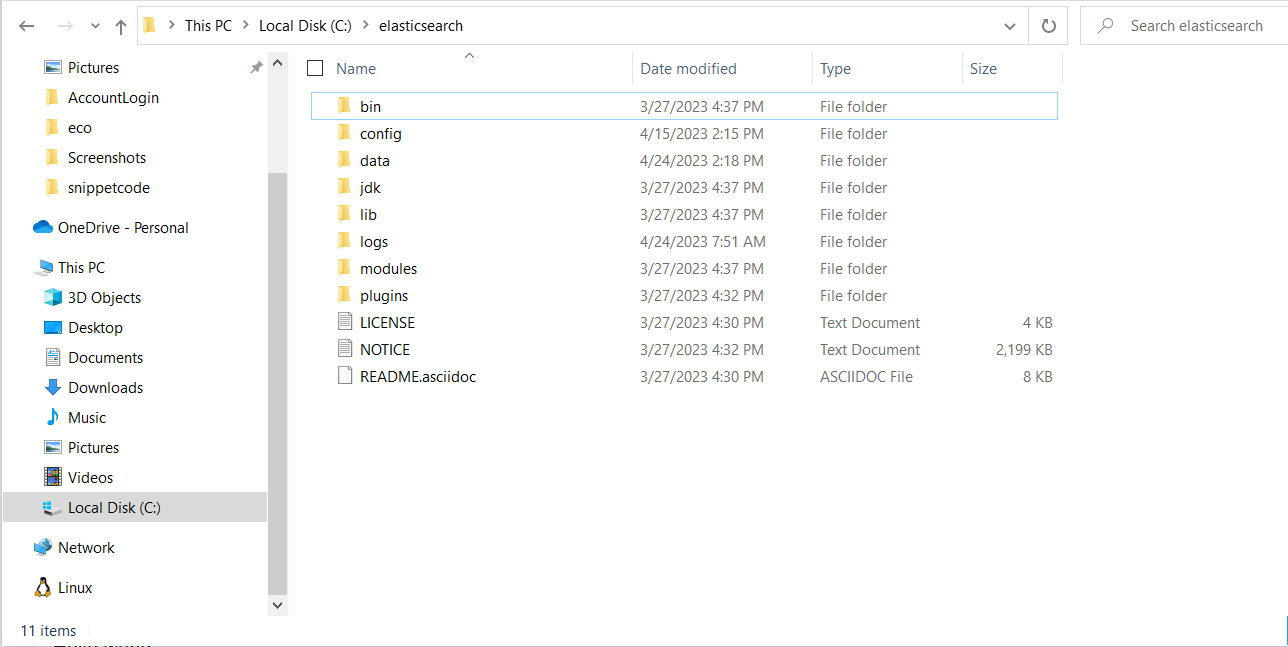
The Elasticsearch server is started using the elasticsearch script or batch file that is located in the Elasticsearch bin directory. Hence, run the following command to start Elasticsearch:
bin/elasticsearch or bin\elasticsearch.bat
Elasticsearch typically includes built-in security features such as user authentication and access control. The default Elasticsearch configuration sets up a randomly generated password with a username of "elastic". Hence, let use the following command to skip username and password:
xpack.security.enabled: true
xpack.security.authc:
  anonymous:
    username: anonymous_user
    roles: superuser
» elasticsearch.yml
# ======================== Elasticsearch Configuration =========================
#
# NOTE: Elasticsearch comes with reasonable defaults for most settings.
#       Before you set out to tweak and tune the configuration, make sure you
#       understand what are you trying to accomplish and the consequences.
#
# The primary way of configuring a node is via this file. This template lists
# the most important settings you may want to configure for a production cluster.
#
# Please consult the documentation for further information on configuration options:
# https://www.elastic.co/guide/en/elasticsearch/reference/index.html
#
# ---------------------------------- Cluster -----------------------------------
#
# Use a descriptive name for your cluster:
#
#cluster.name: my-application
#
# ------------------------------------ Node ------------------------------------
#
# Use a descriptive name for the node:
#
#node.name: node-1
#
# Add custom attributes to the node:
#
#node.attr.rack: r1
#
# ----------------------------------- Paths ------------------------------------
#
# Path to directory where to store the data (separate multiple locations by comma):
#
#path.data: /path/to/data
#
# Path to log files:
#
#path.logs: /path/to/logs
#
# ----------------------------------- Memory -----------------------------------
#
# Lock the memory on startup:
#
#bootstrap.memory_lock: true
#
# Make sure that the heap size is set to about half the memory available
# on the system and that the owner of the process is allowed to use this
# limit.
#
# Elasticsearch performs poorly when the system is swapping the memory.
#
# ---------------------------------- Network -----------------------------------
#
# By default Elasticsearch is only accessible on localhost. Set a different
# address here to expose this node on the network:
#
network.host: 127.0.0.1
#
# By default Elasticsearch listens for HTTP traffic on the first free port it
# finds starting at 9200. Set a specific HTTP port here:
#
http.port: 9200
#
# For more information, consult the network module documentation.
#
# --------------------------------- Discovery ----------------------------------
#
# Pass an initial list of hosts to perform discovery when this node is started:
# The default list of hosts is ["127.0.0.1", "[::1]"]
#
discovery.seed_hosts: ["127.0.0.1", "[::1]"]
#
# Bootstrap the cluster using an initial set of master-eligible nodes:
#
# cluster.initial_master_nodes: ["node-1", "node-2"]
#
# For more information, consult the discovery and cluster formation module documentation.
#
# ---------------------------------- Various -----------------------------------
#
# Allow wildcard deletion of indices:
#
#action.destructive_requires_name: false

#----------------------- BEGIN SECURITY AUTO CONFIGURATION -----------------------
#
# The following settings, TLS certificates, and keys have been automatically
# generated to configure Elasticsearch security features on 15-04-2023 07:14:58
#
# --------------------------------------------------------------------------------

# Enable security features
xpack.security.enabled: true
xpack.security.authc:
  anonymous:
    username: anonymous_user
    roles: superuser

xpack.security.enrollment.enabled: true

# Enable encryption for HTTP API client connections, such as Kibana, Logstash, and Agents
xpack.security.http.ssl:
  enabled: true
  keystore.path: certs/http.p12

# Enable encryption and mutual authentication between cluster nodes
xpack.security.transport.ssl:
  enabled: true
  verification_mode: certificate
  keystore.path: certs/transport.p12
  truststore.path: certs/transport.p12
# Create a new cluster with the current node only
# Additional nodes can still join the cluster later
cluster.initial_master_nodes: ["DHA-000462"]

# Allow HTTP API connections from anywhere
# Connections are encrypted and require user authentication
http.host: 0.0.0.0

# Allow other nodes to join the cluster from anywhere
# Connections are encrypted and mutually authenticated
#transport.host: 0.0.0.0

#----------------------- END SECURITY AUTO CONFIGURATION -------------------------
When you access https://127.0.0.1:9200, the following output can be expected.
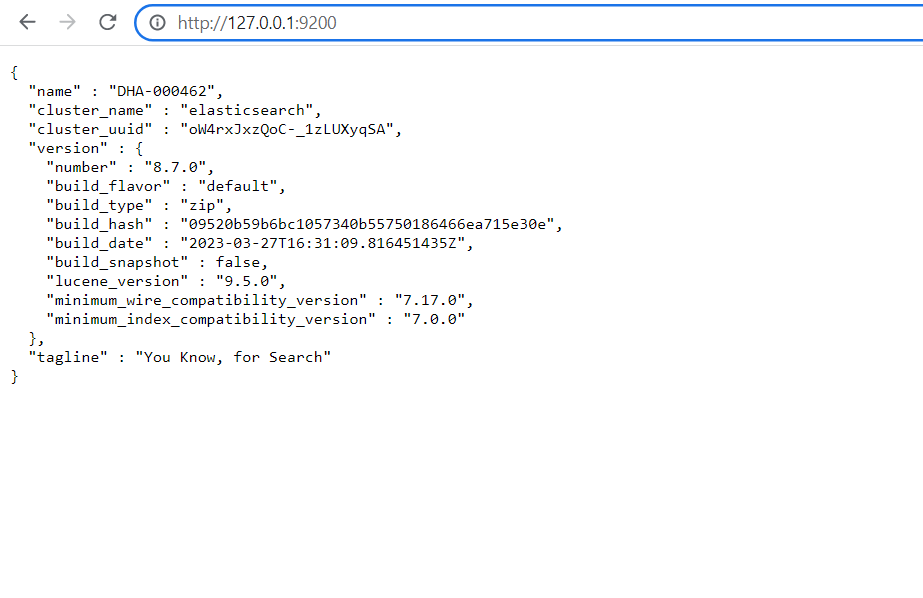
Note: By default, Elasticsearch uses the hostname of the machine as the node name to ensure that each node has a unique name within the cluster.
If you want to enable SSL/TLS encryption for both HTTP and transport connections in Elasticsearch, you can modify the elasticsearch.yml file as follows:
# Enable encryption for HTTP API client connections, such as Kibana, Logstash, and Agents
xpack.security.http.ssl:
  enabled: false
  keystore.path: certs/http.p12

# Enable encryption and mutual authentication between cluster nodes
xpack.security.transport.ssl:
  enabled: false
  verification_mode: certificate
  keystore.path: certs/transport.p12
  truststore.path: certs/transport.p12
III. Implement ElasticSearch in Laravel Application
The elasticsearch/elasticsearch package provides a set of classes and methods that allow developers to build applications that can communicate with Elasticsearch servers. Hence, use the following command to install the official Elasticsearch PHP client library for Elasticsearch.
composer require elasticsearch/elasticsearch
Note: The project utilizes version 7.12 of the Elasticsearch PHP client library, specified as "elasticsearch/elasticsearch": "7.12" in the composer.json file.
To use Laravel Scout, a search package in Laravel, you need to specify the Elasticsearch host(s) to be used. This configuration enables communication between Laravel Scout and the Elasticsearch server, allowing for the indexing and searching of data.
» elasticsearch.php
<?php
return [
    'hosts' => [
        env('ELASTICSEARCH_HOST', 'http://127.0.0.1:9200')
    ]
];
Let us move on to creating a new service provider class in the Laravel application which will be used to register any Elasticsearch related services and dependencies required for the application to communicate with Elasticsearch.
php artisan make:provider ElasticsearchServiceProvider
» ElasticsearchServiceProvider.php
<?php

namespace App\Providers;

use Elasticsearch\ClientBuilder;
use Illuminate\Support\ServiceProvider;

class ElasticsearchServiceProvider extends ServiceProvider
{
    /*
     * Register services.
     *
     * @return void
     */
    public function register()
    {
        /* If elasticsearch ready and you can uncomment */
        $this->app->bind(ClientBuilder::class, function () {
            $config = config('elasticsearch');
            return ClientBuilder::create()
                ->setHosts($config['hosts'])
                ->build();
        });
    }

    /*
     * Bootstrap services.
     *
     * @return void
     */
    public function boot()
    {
        /* If elasticsearch ready and you can uncomment */
        $client = ClientBuilder::create()->build();
        $params = [
            'index' => 'demo_index',
            'body' => [
                'settings' => [
                    'number_of_shards' => 2,
                    'number_of_replicas' => 1
                ]
            ]
        ];
        $exists = $client->indices()->exists(['index' => 'demo_index']);
        if (!$exists) {
            $client->indices()->create($params);
        }
    }
}
Note: In the given code snippet, demo_index is the name of the index that we are creating or updating settings for Elasticsearch. You can totally modify it with valid name.
To list all index names in Elasticsearch using the HTTP API, you can send a GET request to the _cat/indices endpoint of your Elasticsearch cluster, as follows:
C:\Users\admin>curl --verbose http://127.0.0.1:9200/_cat/indices
*   Trying 127.0.0.1:9200...
* Connected to 127.0.0.1 (127.0.0.1) port 9200 (#0)
> GET /_cat/indices HTTP/1.1
> Host: 127.0.0.1:9200
> User-Agent: curl/8.0.1
> Accept: */*
>
< HTTP/1.1 200 OK
< X-elastic-product: Elasticsearch
< content-type: text/plain; charset=UTF-8
< Transfer-Encoding: chunked
<
yellow open flagtick_index kl7l73FUQPSB8kRuP8qCSQ 2 1 145 0 10.1mb 10.1mb
yellow open my_index       x_NSN5O8RhKqBb9zENmRSQ 1 1 144 0 10.1mb 10.1mb
* Connection #0 to host 127.0.0.1 left intact
Registering Elasticsearch-related services and dependencies in Laravel using the ElasticsearchServiceProvider makes it easier to implement Elasticsearch features in the application.
» config/app.php
...
	App\Providers\AppServiceProvider::class,
	App\Providers\AuthServiceProvider::class,
	// App\Providers\BroadcastServiceProvider::class,
	App\Providers\EventServiceProvider::class,
	App\Providers\RouteServiceProvider::class,
	App\Providers\ElasticsearchServiceProvider::class,
],
Using the link as below to retrieve the health status of Elasticsearch cluster in a human-readable format.
curl --verbose http://127.0.0.1:9200/_cat/health?v
Before moving forward, index the array of articles into Elasticsearch using the Elasticsearch index API, you can use the following code:
$articles = Article::all();
$this->documents = [];
foreach ($articles as $article) {
	$document = [
		'index' => [
			'_index' => 'flagtick_index',
			'_id' => $article->id,
		],
	];

	$document['body'] = [
		'id' => $article->id,
		'title' => $article->title,
		'content' => $article->content,
		'created_at' => $article->created_at,
		'updated_at' => $article->updated_at
	];

	$this->documents[] = $document;
}
$client = ClientBuilder::create()->build();
$params = [
	'body' => $this->documents,
];
$client->bulk($params);
Note: Here's the code structure with the specified namespaces:
- app
  |- Console
  |  |- Commands
  |  |  |- ElasticArticle.php
  |  |- Kernel.php
  |- Models
  |  |- Article.php
Take advantage of the ElasticArticle command by scheduling it with scheduler or cron job to automatically index an array of articles into the Elasticsearch server. To retrieve all data from Elasticsearch, you can use the following URL:
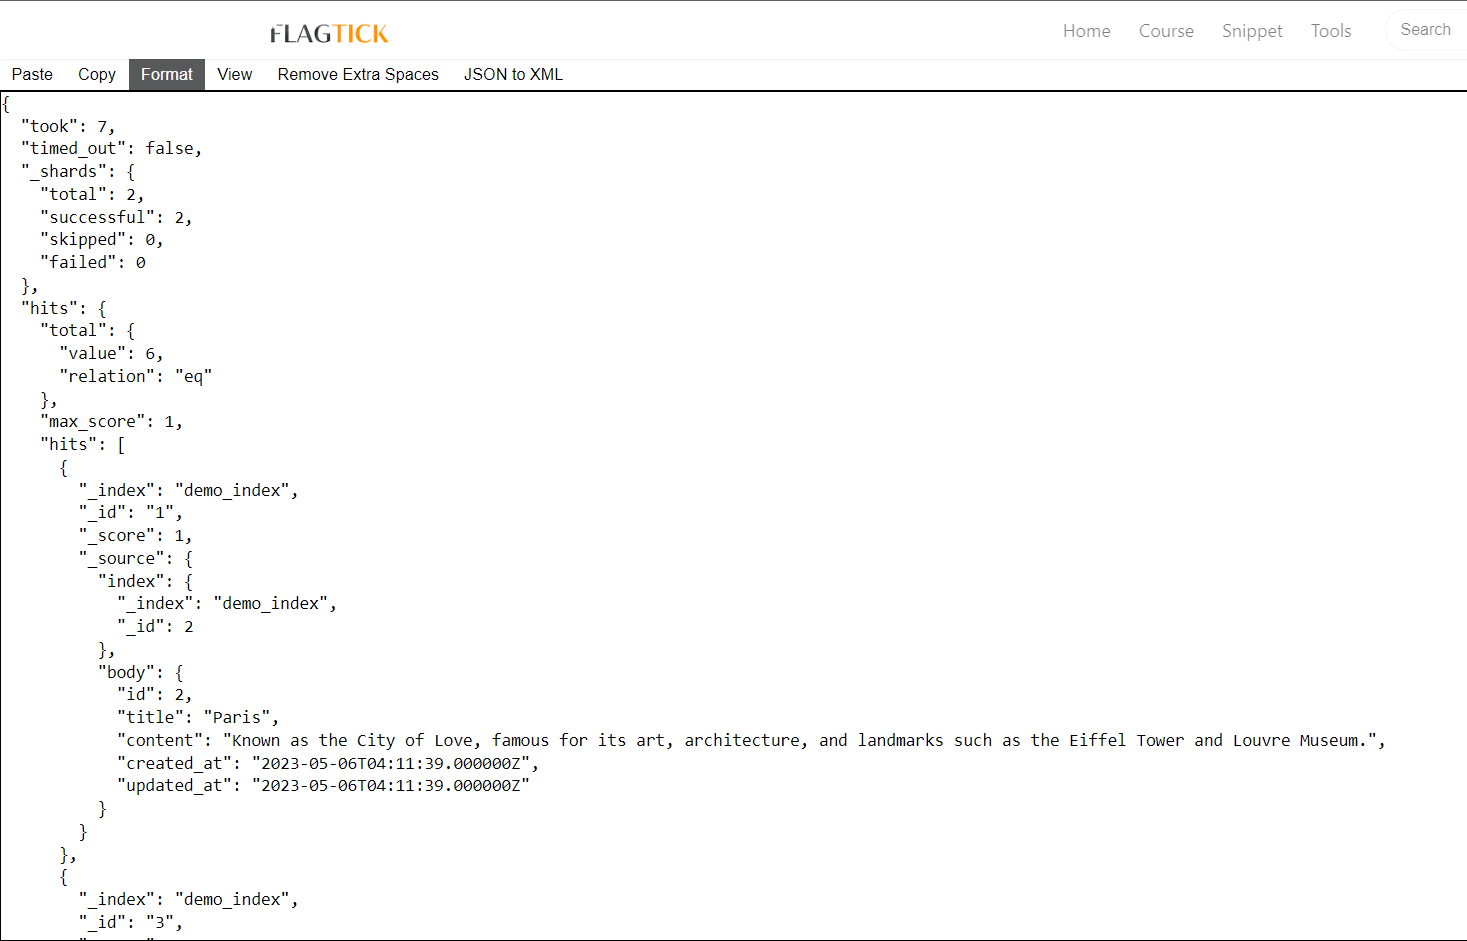
http://127.0.0.1:9200/demo_index/_search
We can use the website https://flagtick.com/viewjson to view the response body from a given URL.
You can write REST APIs to retrieve data from a Laravel application. The search function you provided is an example of a controller method that could be used as part of a REST API.
public function searchbyElastic(Request $request) {
    $params = [
        'index' => 'demo_index',
        'body' => [
            'query' => [
                'match' => [
                    'body.title' => $request->input('keyword')
                ]
            ]
        ]
    ];
    $client = ClientBuilder::create()->build();
    $response = $client->search($params);
    return $response['hits']['hits'];
}
IV. Install Elasticsearch on Ubuntu VPS
To set up Elasticsearch on a VPS running Ubuntu, you will need to use the command sudo wget https://artifacts.elastic.co/downloads/elasticsearch/elasticsearch-7.12.0-linux-x86_64.tar.gz to download the Elasticsearch package onto the server.
cd //
sudo wget https://artifacts.elastic.co/downloads/elasticsearch/elasticsearch-7.12.0-linux-x86_64.tar.gz
sudo tar -xzf elasticsearch-7.12.0-linux-x86_64.tar.gz
sudo sudo mv elasticsearch-7.12.0 /usr/share/elasticsearch
The next step is to configure Elasticsearch, navigate to the /usr/share/elasticsearch/config/ directory and edit the elasticsearch.yml file using a text editor like nano or vim. Some recommended configurations to start with are:
» config/elasticsearch.yml
# ======================== Elasticsearch Configuration =========================
#
# NOTE: Elasticsearch comes with reasonable defaults for most settings.
#       Before you set out to tweak and tune the configuration, make sure you
#       understand what are you trying to accomplish and the consequences.
#
# The primary way of configuring a node is via this file. This template lists
# the most important settings you may want to configure for a production cluster.
#
# Please consult the documentation for further information on configuration options:
# https://www.elastic.co/guide/en/elasticsearch/reference/index.html
#
# ---------------------------------- Cluster -----------------------------------
#
# Use a descriptive name for your cluster:
#
# cluster.name: flagtick-application
#
# ------------------------------------ Node ------------------------------------
#
# Use a descriptive name for the node:
#
# node.name: flagtick-node-1
#
# Add custom attributes to the node:
#
# node.attr.rack: r1
#
# ----------------------------------- Paths ------------------------------------
#
# Path to directory where to store the data (separate multiple locations by comma):
#
# path.data: /path/to/data
#
# Path to log files:
#
# path.logs: /path/to/logs
#
# ----------------------------------- Memory -----------------------------------
#
# Lock the memory on startup:
#
# bootstrap.memory_lock: true
#
# Make sure that the heap size is set to about half the memory available
# on the system and that the owner of the process is allowed to use this
# limit.
#
# Elasticsearch performs poorly when the system is swapping the memory.
#
# ---------------------------------- Network -----------------------------------
#
# By default Elasticsearch is only accessible on localhost. Set a different
# address here to expose this node on the network:
#
network.host: 127.0.0.1
#
# By default Elasticsearch listens for HTTP traffic on the first free port it
# finds starting at 9200. Set a specific HTTP port here:
#
http.port: 9200
#
# For more information, consult the network module documentation.
#
# --------------------------------- Discovery ----------------------------------
#
# Pass an initial list of hosts to perform discovery when this node is started:
# The default list of hosts is ["127.0.0.1", "[::1]"]
#
discovery.seed_hosts: ["127.0.0.1", "[::1]"]
#
# Bootstrap the cluster using an initial set of master-eligible nodes:
#
cluster.initial_master_nodes: ["boring-swanson.13-221-25-264.plesk.page"]
#
# For more information, consult the discovery and cluster formation module documentation.
#
# ---------------------------------- Various -----------------------------------
#
# Require explicit names when deleting indices:
#
#action.destructive_requires_name: true


# Allow HTTP API connections from anywhere
# Connections are encrypted and require user authentication
http.host: 0.0.0.0
Note: Using hostname command to check name of cluster.initial_master_nodes to update. For example: My computer is boring-swanson.13-221-25-264.plesk.page.
After that creating new user named "elasticsearch" on the system with the home directory set to "/usr/share/elasticsearch/".
sudo useradd elasticsearch -d /usr/share/elasticsearch/
sudo chown -R elasticsearch:elasticsearch /usr/share/elasticsearch
Switch the current user to the elasticsearch user and start Elasticsearch in the background as a daemon process.
sudo su elasticsearch
/usr/share/elasticsearch/bin/elasticsearch -d
Then, you can use curl http://127.0.0.1:9200 to see how elasticsearch ready on VPS server.
curl http://127.0.0.1:9200
{
  "name" : "boring-swanson.13-221-25-264.plesk.page",
  "cluster_name" : "elasticsearch",
  "cluster_uuid" : "YO5VGmTzRhmGa1Zs5deNdg",
  "version" : {
    "number" : "7.12.0",
    "build_flavor" : "default",
    "build_type" : "tar",
    "build_hash" : "78722783c38caa25a70982b5b042074cde5d3b3a",
    "build_date" : "2021-03-18T06:17:15.410153305Z",
    "build_snapshot" : false,
    "lucene_version" : "8.8.0",
    "minimum_wire_compatibility_version" : "6.8.0",
    "minimum_index_compatibility_version" : "6.0.0-beta1"
  },
  "tagline" : "You Know, for Search"
}
Getting start Elasticsearch as a systemd service, you can create elasticsearch.service file in the /etc/systemd/system/ directory with the following content:
[Unit]
Description=Elasticsearch

[Service]
ExecStart=/usr/share/elasticsearch/bin/elasticsearch
Restart=always
User=elasticsearch
Group=elasticsearch
Environment=JAVA_HOME=/usr/lib/jvm/java-11-openjdk-amd64

[Install]
WantedBy=multi-user.target
Then, you can start and check status the service by running:
sudo systemctl start elasticsearch.service
sudo systemctl status elasticsearch.service
You can check if incoming traffic is allowed by the firewall by verifying whether port 9200 is blocked on the Lightsail instance. If you are still unable to access Elasticsearch from outside the instance, it is recommended to investigate the firewall settings.
sudo ufw enable
sudo ufw allow 9200/tcp or sudo ufw allow 9200
sudo ufw reload && sudo ufw status
Using command is used to retrieve information about the Elasticsearch cluster, specifically the name of the current master node.
curl -XGET http://127.0.0.1:9200/_cat/master?v
V. Conclusion
In the article, Integrating Elasticsearch into a Laravel application on a VPS server can greatly improve search functionality and performance. By following the necessary steps to install and configure Elasticsearch, as well as utilizing the Laravel Scout package, developers can easily implement powerful search capabilities into their web application. Additionally, Elasticsearch's scalability and flexibility make it a reliable choice for handling large amounts of data and adapting to changing search requirements.
VI. Video